
.NET Cloud Migration Move to Azure Efficiently
Quick Summary:Cloud adoption is increasing at a fast rate and businesses are using it for better effectiveness, scalability and performance optimization. This blog will walk you through a guide and a step by step roadmap for seamless migration to Azure. From pre assessment strategy, execution and optimization you will discover everything you need to move ahead confidently. By the end you will know how to leverage the full potential of Azure for future ready applications.
Introduction
The world is certainly moving towards huge adoption of cloud based development. It is majorly due to cost savings, scalability, adaptability and other benefits offered. Moreover cloud migration is one of the best ways to start a step towards digital transformation. One of the best choices to prefer for this migration is Microsoft Azure that is powerpacked with best tools. It offers high-quality services that will assist you in resolving all of your issues. If you don’t have a plan to stick on, migrating to cloud services can be a tough call.
Our goal with this tutorial is to give you a successful relocation procedure. You will become more comfortable with this migration as you go through each step. Your goal for this migration might aim to enhance efficiency, update your infrastructure or make the most out of the new technologies for .NET development services.
This checklist has all the necessary steps that can ensure smooth and seamless migration to the cloud. It starts from initial assessment to developing a strategy and execution with optimization. If you follow these steps carefully, you will be ready to employ the best capabilities of Azure and achieve business goals faster.
Why should you opt for Azure for cloud migration?

Successful transformation of your business architecture will only revolve around your choice for the platform. Microsoft based Azure has an edge over all others in the field. It is a superior choice over others for following reasons:
- Exceptional cloud services such as cloud computing, storage, database, analytics and more.
- Integration without any concerns with SQL server, directory, windows server and other products that belong to Microsoft.
- A huge network of data centers that has lesser latency with higher availability.
- Outstanding security features include threat protection, identity management, and end-to-end encryption.
- Ability to control and manage cost with pay as you go model.
- A slower approach towards migration to use both on-premises and cloud services in a better way.
- Keeping updated with new features every time for adoption of the latest technologies.
Move your .NET application to Azure with confidence
- Smooth, secure and efficient migration
- Expert Azure support
Checklist of steps for seamless cloud migration with Azure
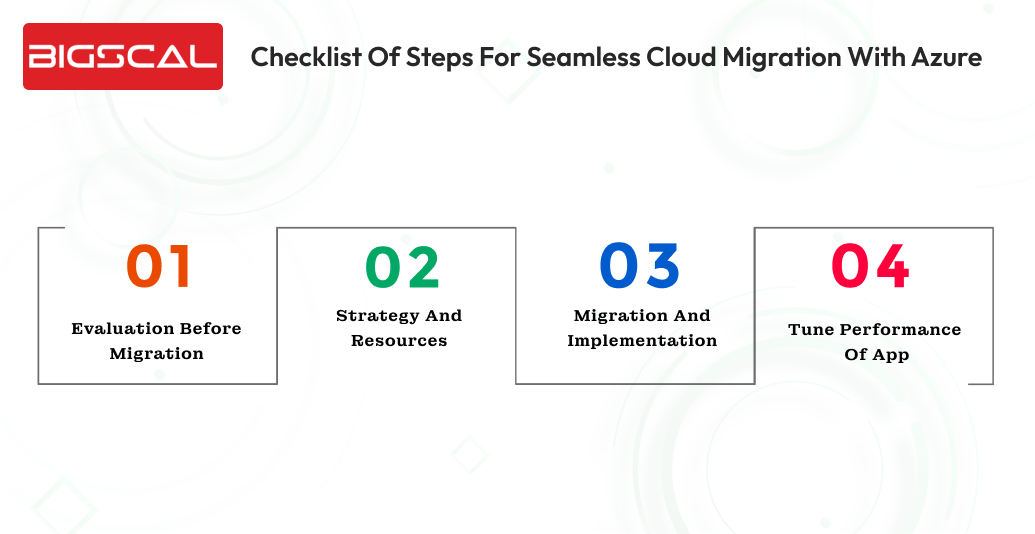
To ensure a great result you will have to get a step by step approach for cloud migration. Here are those steps:
Step: 1 Evaluation before migration
It is possible to completely plan and carry out Azure migration with the help of following steps for pre evaluation. It guarantees a safer transition for you while making great advantages and minimising risks.
Set migration goals
You must be ready with your objective of this migration before starting it. Decide if you want enhanced scalability, lesser costs, better performance or something more. Setting these objectives will ensure that you plan in a particular direction and make it successful.
Check for applications and its workload
This step consists of examining the workload on the current application. You can use Microsoft powered CAF to check if your application is ready for migration to the cloud or not. Some key areas you must assess are:
- Functionality: Check each functionality of the application and their dependency on other systems. It will help you feel assured about how well it will work with Azure.
- Technical stack: Check what functions, framework, languages, database and other technologies are used by application. Make sure it aligns with Azure.
- Resource utilisation: Capture the rate at which your apps are currently using CPU power, memory, storage and resources. It will help you pre-analyze future plans in accordance with Azure.
- Security requirements: Review all necessary information or data that needs security measures at the right point. Identify all sensitive information and how to keep them safe.
Check data and network
At first you have to make sure that your data is organized and is ready for migration. Check for the latency and bandwidth to ensure better performance standards and a transfer that is smooth.
Conduct a cost evaluation
Go through a detailed case study of cost results when you decide to move to Azure. Analyze where you can save money, calculate data transfer expenses and cloud service charge. This evaluation will save you from any unimagined costs and set a proper budget.
Step: 2 Strategy and resources
Thoroughly check your current infrastructure and carefully set migration objectives to get a successful transition.
Choose your strategy
Depending on how complex your application is and the output you desire you will have to choose a strategy. With the present resources you will have to opt for a suitable strategy. Select the best strategy from the workload listed in the Migration checklist. Here are some alternatives:
- Rehost: You can instantly activate the current application to Azure virtual machine “as-us.”
- Rearchitect: This is a similar approach to rehost but it includes making small changes to the cloud environment. It might consist of enhancing setups or using managed services.
- Refactoring: Employ cloud native based technologies and transform your application to enhance scalability and performance. This process might be time consuming but has plenty of benefits in the long term.
- Rebuilding: Employ new Azure tools to develop a new cloud application.
When you switch to Azure it provides you with the ability to enhance your efficiency and speed of the project. You can use its features to develop flexible and even based apps without need of infrastructure support. You can also use Azure to refurbish your old applications.
Develop a migration plan
Develop a migration strategy that includes a detailed view of each step of the move. Allot resources, draw schedules and important milestone dates. You can ensure that everything works orderly and a great result is achieved timely by planning out an effective strategy.
- Migration scope: Mention which workload will be migrated and when it will happen.
- Migration timeline: Set a deadline for each phase to end by considering dependencies, tests and more.
- Resource allocation: Make sure the staff and technical aspects needed in the process are ready.
- Rollback strategy: If any urgency occurs do have a plan to get back to on-premises apps.
Create your Azure environment
By now you have to start developing your Azure environment by allocation of resources, creating groups, networks, and necessary services while incorporating Configuration drift management to ensure consistency across deployments. Ensure that your configuration is ready to handle the workload you are migrating and complies with your company’s requirements.
Set up compliance and security measures
To make sure that your Azure migration is safe and abides to the standards of industry follow compliance controls and security strategies. This step is a necessary factor to ensure safety and better resource management.
- Resource tagging: Employ standard tagging for your resources to divide costs effectively and protect organization.
- Cost management: Make the best use of Azure’s cost management feature to check on the expense you have made on cloud migration.
- Compliance requirements: Whenever you start with the process take out time to ensure the steps necessary as per industry standards such as HIPAA in your configuration.
Check for operational readiness
Ensure that the team, resources and procedure along with the system is up for migration. Check if you have operating protocols and support systems all together to manage the migration and avoid potential issues.
Choose your migration strategy with tomorrow in your mind. Conduct a quick “future fit check” that can save you from rebuilding it twice. Build once to scale it forever.
Step: 3 Migration and Implementation
By this step you will have to be sure that all the necessary tools and resources for implementation are present and then plan your migration.
Back up and validate data
One of the necessary tasks is to maintain data security. Create a backup copy of the data beforehand to avoid any chances of losing it if the plan falls back during .NET maintenance services. So how can you do it?
- Create a secure backup for your on-premises data with the best tools and services.
- Try test restores to check for data integrity before making actual backup.
Perform testing before migration
Before you carry out actual migration it is necessary to perform a pre migration test. Hence use this to ensure everything works great. Through this test you can avoid chances of risks and ensure the system is ready for transfer.
Start workload migration
The most crucial part of Azure migration is where the actual data transfer takes place to Azure. Tools for this migration are:
- If you want the process to be faster and automatic, apply Microsoft tools such as Microsoft Database migration services or Azure migrate.
- As you begin this process, adhere to recommended standards for application configuration, migration, and testing.
Monitor and solve problems
After you complete migration you must keep an eye on the transferred data and catch any problems or mistakes in it. Active monitoring include:
- Track use of resources, application performance along with security indicators through Azure monitoring tools.
- Be ready to deal with any problem as soon as possible to avoid downtime or problems.
Confirm and validate migration
So what actually you have to do:
- Check data integrity: Employs tools such as checksums, validation tools, and test queries along with reports to ensure integrity of migrated data whether it’s correct or not.
- Ensure application functionality: Make sure that the app you have migrated is functional as decided in the Azure environment by testing it.
- Optimize cost and performance: You can use auto-scaling features for better effectiveness, uncover issues through monitoring tools and allot resources in the best manner.
- Safeguard your environment: Continuously keep a check and improve security rules and limit access. Also make sure to manage vulnerabilities and threats through the security center.
Step: 4 Tune performance of app
If you aim to have the best efficiency of your application, track its performance and areas that need attention.
Optimize and refine
After you have completed your migration, you must now intend on streamlining your setup for better efficiency. To improve complete efficacy you will have to change how you allot resources. You can do so with the usage trend and performance metrics.
- Performance optimization: Use monitoring tools provided by Azure for detecting issues in resource allocation. Use techniques such as caching, balancing loads and more. It ensures better performance in the cloud.
- Cost management; Have an eye on the usage resources in Azure and its costs for .NET software development. Ensure that you use its cost management tool to decide where you can cut costs through reversed instances, changing resource size as per real requirements and setting pricing tiers for consumption patterns.
Setup disaster recovery and backup solutions
When you consider .NET application development and migration you have to ensure that disaster recovery is in place. You have to get Azure backup and site recovery to protect data from future disturbances.
- Disaster recovery: To ensure that business keeps on going during issues develop and execute a complete recovery plan.
- Regular backups: Keep a schedule of having regular backups for necessary Azure data and resources. It can be your point of safety during accidental data loss or corruption. You will also have a real time copy in your hand.
Provide ongoing support and training
You must ensure that your team has regular training and resources by their side to stay updated with the latest technologies.
- Continuous learning: Make sure to prep your team to remain up to date about the latest features of Azure, its services and best practices. They can use Microsoft’s training materials, certificates or guides for this process.
- Knowledge sharing: Your team must have a collaborative approach to share knowledge between team members. It enhances effectiveness and affects success. Encourage that experienced team members must explain best practices and concepts.
Foster idea of continuous improvement and innovation
The best way to make your Azure migration of .NET development services successful is to keep on improving. Keeping an eye on your cloud app and capitalizing on new features is necessary. Keep your cloud architecture in sync with business goals.
- Accept new services: Check the offerings of Azure after your migration is done. You can make use of tools like Cognitive services, Machine learning and more to reach a new height. It can improve performance of your apps as per our checklist.
- Innovation and automation: Make sure there is space for automation in your Azure migration. You can handle IT operations in a better way, operations can be streamlined and configurations can be managed.
- Security focus: When you want an intact security you will have to continuously put an effort. To ensure your Azure environment is safe, you must check and enhance threat detection. Plan security regularly and check access control.
Conclusion
To conclude it is significantly possible to enhance performance, scalability and agility of your application by migrating it to the cloud. When you plan this transition carefully from on premises to Azure it can assure you a safe and reliable environment. By following the comprehensive guide we outlined in this article it’s pretty sure you will have a safe start and guaranteed success.
Know that each phase of migration has its importance and completing them carefully is necessary. Everything must be done correctly, from the first pre-migration examination to optimization and performance tuning. You have to hire ASP.NET developers that are skilled enough to complete migration effectively. Choose trusted partners in migration like Bigscal Technologies for a safe and secure approach.
FAQ
What are the steps to migrate .NET apps to Azure?
The steps to effectively migrate .NET apps to Azure include pre-migration assessment, strategy planning, implementation, and performance tuning.
What is Azure cloud migration?
Azure cloud migration is a process where an application is transferred from on-premises infrastructure to the Azure cloud environment.
Why should I choose Azure for cloud services?
Azure offers seamless integration with Microsoft tools, global availability, strong security, reliable performance, and extensive cloud services.
How to check if my application is ready for migration?
You should assess the application functionality, tech stack, resource usage, and security requirements before deciding to migrate.
What is the process of migration to the cloud through Azure?
The Azure migration process includes assessing the environment, planning the migration, executing the migration, and ensuring ongoing security and optimization.
How do you ensure the security of Azure cloud applications?
Bigscal ensures full compliance with standards, uses encryption, manages access controls, and performs continuous security assessments.
Will my application need changes in code before Azure migration?
Yes, minor refactoring is often required to align the application with Azure architecture for better performance and compatibility.
Will Azure tools help in automation of migration?
Absolutely. Azure Migrate, Database Migration Service, and App Migration Assistant help automate and streamline the migration process.
Is downtime required during migration?
Yes, a minimal downtime is required, but it can be reduced through phased migration, blue-green deployment, and synchronization techniques.
Can I run hybrid infrastructure with Azure?
Yes, Azure supports hybrid setups, allowing you to run some parts on-premises and others on the cloud during phased or partial migration.

