.NET 6 : Introduction, Features & Example
Quick Summary: Go ahead, unleash performance, productivity, and innovation with an open-source framework by .Net 6. Get to know its cross-platform potential, an API for the web end, and perfect integration with the cloud. Whichever way you are going, you will not only learn web applications development with ASP.Net and even build desktop solutions that work or mobile user experiences that come with Xamarin. .Net 6 allows you to build all customized apps. Isn’t it bringing curiosity? Well, you can’t deny that. Read more to understand more.
Introduction
In this era of high-performance technologies and software, choosing the right tools can be the difference between mediocrity and excellence. But that’s where you get confused! Right, No?
.NET 6 has many advantages including increases data security, use C#10 languages, improve website performance, and provide HTTP 3 support.
There is a notable difference between .Net 5 and .Net 6 in terms of programming language and compatibility. Speed of .Net6 is more than .Net5 and it is considered as a step in advanced language technology.
.Net 6 was created by microsoft as an open source platform, which means that any developer can use this framework without investing a single amount. Furthermore, .Net 6 is available on each platform.
The commonality between .Net 5 and .Net 6, they both are open source, available on visual studio, and cross-platform. They are distinct in term of programming languages as .Net 5 use C#9 and f#5, where as .Net use C#10 and C#6.
Why get confused when you have us as your technical adviser?
With this blog, we have created the fantastic creation of Microsoft, which is DotNet 6. With an impressive 50% increase in performance compared to its predecessor, .Net Core 6 stands at the top of innovation. Additionally, it brings endless possibilities for developers.
So, here we are about to present insightful examples of.NET 6. Furthermore, we will also cover how this framework helps you create seamless web applications.
But with this, you also need to hire a .Net core developer to leverage the full knowledge of .Net 6.
Keep reading!!!
Support
- .NET 6 is a Long-term Support (LTS) release that will be supported for 3 years.
- The .NET 6 runtime is supported with Visual Studio 2022 and Visual Studio 2022 for Mac. It is not supported with Visual Studio 2019, Visual Studio for Mac 8, or MSBuild 16.
- It is necessary to upgrade to Visual Studio 2022 (which is now 64-bit as well) if you wish to use .NET 6.
- Multi-OS compatibility (Windows, Linux, macOS, Android, iOS, and tvOS) is supported, including macOS Apple Silicon, and Windows Arm64.
- With .NET 6, developers can develop browser, desktop, cloud, IoT, and mobile applications on a single platform.
Implementing .NET 6
- For .NET 6, you need to use a .NET 6 target framework, such as the following:
- <PropertyGroup>
<TargetFramework>net6.0</TargetFramework>
<Nullable>enable</Nullable>
<ImplicitUsings>enable</ImplicitUsings>
</PropertyGroup>
- <PropertyGroup>
- The net6.0 Target Framework Moniker (TFM) grants you access to all of the cross-platform APIs offered. NET.
- If you want to develop a specific operating-system-specific application (e.g., if you are using Windows Forms or Apple’s iOS), then there are other TFM tools for you to use (that target the various self-evident operating systems). You get access to all the APIs in net6.0 along with a bunch of OS-specific APIs
Features
1. Hot Reload
- Instant Hot Reload enables displaying code modifications, without app reloading.
- Hot Reload provides the capability to boot your app without rebuilding and reloading every time. Platforms like Flutter, where you can actually see the desired design real time as you insert new lines of code, is a great example of this. It is backed by Visual Studio 2022 and the .NET core (CLI or CLI), for the visual basic and c# respectively.
2. File IO Improvements
- The File Stream system has seen a drastic and almost complete refactor in .NET 6, with a primary focus on increased performance for async file IO.
- This implementation is even faster on Windows now in comparison to the past versions where it was using blocking APIs.
3. Global using directives
- When you use global using directives, you specify a using directive just once and it will be applied to every file you compile.
- Syntax:
- global using System;
global using a static System.Console;
global using Env = System.Environment;
- global using System;
- Statements for global reference can be put in any .cs file, including Program. cs.
- Other features:
- Support for Open Telemetry and DotNet Monitor.
- JavaScript can be used to render Blazor components.
- HTTP/3 support
- Integration of File IO with symbolic links.
Example of .NET 6: Create a web API with ASP.NET Core
- This tutorial shows you how to:
- Create a web API project.
- Add a model class and a database context.
- Scaffold a controller with CRUD methods.
- Configure routing, URL paths, and return values.
- Call the web API with Postman.
- Overview
- For this demo, I’m using Visual Studio Code(VS Code).
- Below are the necessary things if you don’t have it installed on your machine, just visit those links.
1. Create a web API Project
- Open VS Code and then open Terminal(ctrl + ~).
- Change directories (cd) to the folder containing the project folder.
- Execute the following commands:
- dotnet new webapi -o BookApi
- cd BookApi
- dotnet add package Microsoft.EntityFrameworkCore.InMemory –prerelease
- code -r ../BookApi
- These commands,
- Make a new web API project and open it in Visual Studio Code.
- The dialog box that appears will ask if you want to add the required assets to the project. Click Yes.
2. Execute the Project
- This template generates an API with support for Swagger for weather forecasting.
- In the terminal execute the following command:
‘dotnet watch’ 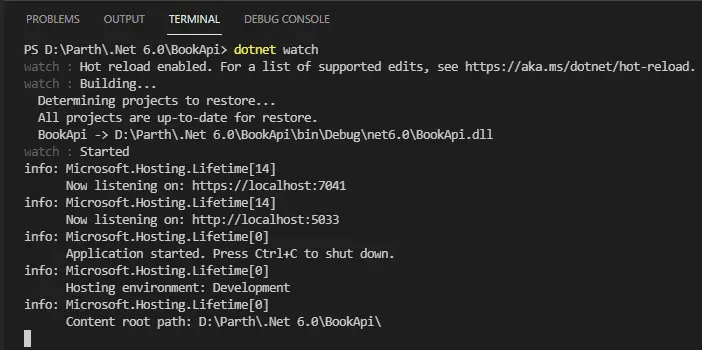
- It will open SwaggerUI on your browser. Now Test the WeatherForecast API.
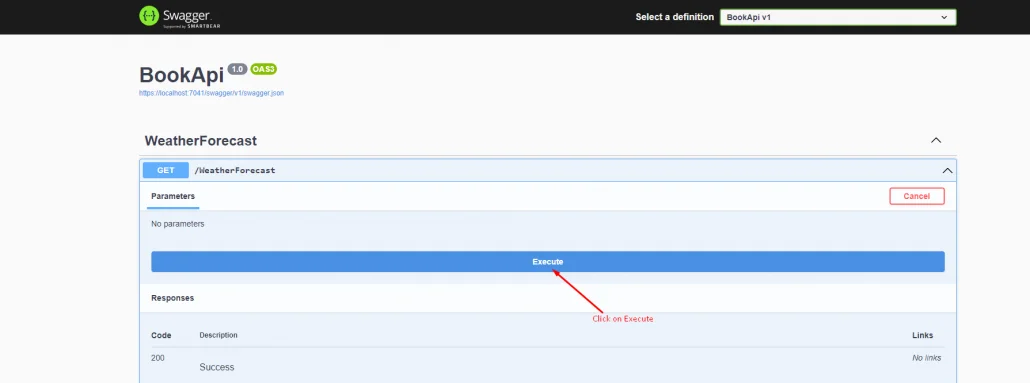
- When you hit that button you will see the following kind of JSON response.
[
            {
            "date": "2022-02-12T14:46:20.8240112+05:30",
            "temperatureC": -3,
            "temperatureF": 27,
            "summary": "Warm"
            },
            {
            "date": "2022-02-13T14:46:20.8242589+05:30",
            "temperatureC": 46,
            "temperatureF": 114,
            "summary": "Sweltering"
            },
            {
            "date": "2022-02-14T14:46:20.8242617+05:30",
            "temperatureC": 49,
            "temperatureF": 120,
            "summary": "Bracing"
            },
            {
            "date": "2022-02-15T14:46:20.8242619+05:30",
            "temperatureC": -14,
            "temperatureF": 7,
            "summary": "Sweltering"
            },
            {
            "date": "2022-02-16T14:46:20.824262+05:30",
            "temperatureC": -4,
            "temperatureF": 25,
            "summary": "Freezing"
            }
            ]
3. Add Model class:
- Create a new folder named Models.
- Add a new C# class Book. cs
- namespace BookApi.Models
-
{
            public class Book
            {
            public int BookId { get; set; }
            public string? Title { get; set; }
            public string? AuthorName { get; set; }
            public string? Language { get; set; }
            public int Price { get; set; }
            }
            }
4. Add database context:
- Create a BookContext.cs file to the Models folder.
-
namespace BookApi.Models
            {
            public class BookContext : DbContext
            {
            public BookContext(DbContextOptions<BookContext> options)
            : base(options)
            {
            }

            public DbSet<Book> Books { get; set; } = null!;
            }
            }
5. Register Database Context in Program.cs:
- In the previous version of .NET 5.0, We are using the Startup.cs file to register Database context and any kind of other dependencies/middleware.
- But Serilog In .Net 6.0, Microsoft removed Startup.cs file and enabled Program.cs to accept Dependency Injection(DI).
- A dependency injection container (DI container) in ASP.NET Core is responsible for delivering DI services to controllers, such as the DB context.
using BookApi.Models;
            using Microsoft.EntityFrameworkCore;

            var builder = WebApplication.CreateBuilder(args);

            // Add services to the container.

            builder.Services.AddControllers();

            builder.Services.AddDbContext<BookContext>(opt =>
            opt.UseInMemoryDatabase("BookList"));

            builder.Services.AddEndpointsApiExplorer();
            builder.Services.AddSwaggerGen();

            var app = builder.Build();

            // Configure the HTTP request pipeline.
            if (app.Environment.IsDevelopment())
            {
            app.UseSwagger();
            app.UseSwaggerUI();
            }
            app.UseHttpsRedirection();
            app.UseAuthorization();
            app.MapControllers();
            app.Run();
6. Scaffolding a Controller:
Run the following commands:
- dotnet add package Microsoft.VisualStudio.Web.CodeGeneration.Design –prerelease
- dotnet add package Microsoft.EntityFrameworkCore.Design –prerelease
- dotnet add package Microsoft.EntityFrameworkCore.SqlServer –prerelease
- dotnet tool install -g dotnet-aspnet-codegenerator –version 6.0.1
- dotnet aspnet-codegenerator controller -name BookController -async -api -m Book -dc BookContext -outDir Controllers
The above commands:
- Structuring requires NuGet packages for Scaffolding.
- Set up the scaffolding engine (dotnet-aspnet-codegenerator).
- Scaffold the BookController
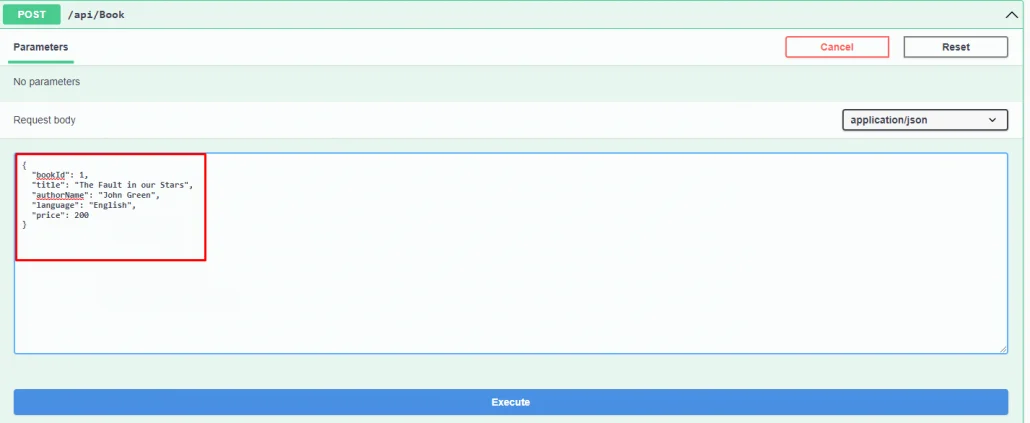
Now run the application by dotnet watch command, it will open Swagger-UI. Execute the POST endpoint that will add records into memory.
After executing the GET endpoint, it will return a JSON response.
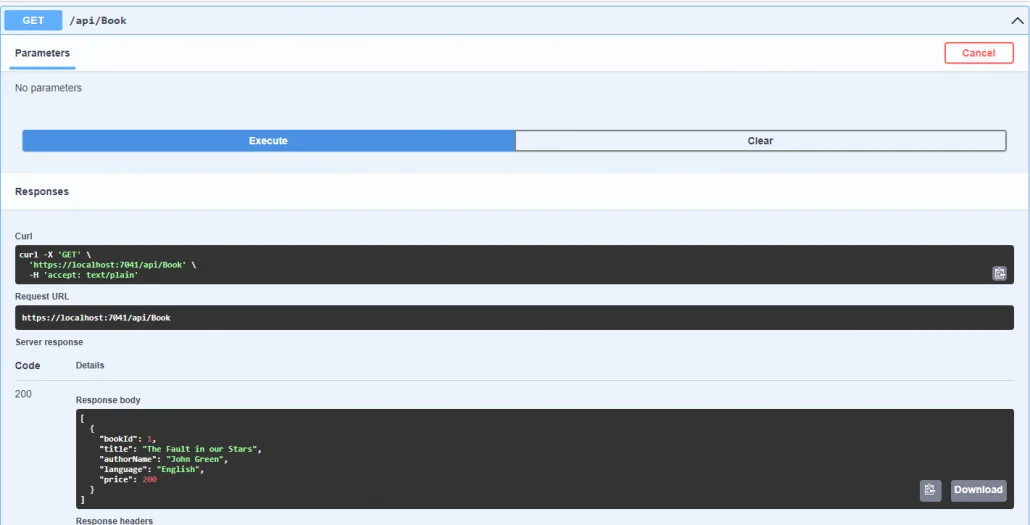
And now from the Swagger, you can execute other endpoints as well.
Conclusion
The above blog provides an overview of.NET 6, highlighting its new features and examples. With .NET 6, developers can streamline the workflow and enhance performance and productivity. ASP.NET Core 6 introduces many enhancements to improve performance and minimize allocations in the application. Developers also benefit from numerous improvements that make developing performant, modern web apps faster and easier.
FAQ
Are .Net Core and .Net Core 6 the same?
Yes there is! They are two sides of the same coin. This version is identified as “6.0” and it was announced that starting with this version the name would be changed to .net.
What is .NET 6 used for?
.NET 6 supports you in building all those types of apps run everywhere – i.e. on your desktop, the cloud and your mobile device. Furthermore, it offers improved performance, cross-platform capabilities, and a wide range of tools and libraries.
What is the difference between.NET 6 and the.NET 6 framework?
NET 6 operates on native Mac and Linux; the NET Framework does not run natively on Mac and Linux, so a third-party runtime like Mono is required. You do not need to install a separate framework for NET 6 to run your application.
Why is.NET Core faster than the.NET framework?
.NET Core is faster than the .NET Framework as it has a modular architecture. Furthermore, cross-platform app development is simplified with lighter versions of core framework components.
Is NET 6 core or framework?
With NET 6, you get the fastest full-stack web framework, which lowers compute costs if you’re running in the cloud. In addition to hot reloading, Visual Studio 2022 offers new git tooling, intelligent code editing, and robust diagnostics and testing tools.

