
How to Integrate Stripe Payment APIs Using Node.JS
Quick Summary: Read this blog to learn how to integrate the stripe payment gateway APIs with node.js securely and efficiently. This article guides you through the steps to gain the knowledge and skills required for seamless Node.js Stripe API implementation.
Introduction
The powerful combination of stripe APIs and node.js enables seamless payment processing and integration for Woocommerce, enhancing the overall user experience.Stripe API is a robust platform that simplifies online transactions, while Node.js, a popular JavaScript runtime, offers a scalable and efficient environment for web applications. Together, they form a dynamic duo that streamlines payment processes.
Nodejs is better than other Languages because it features non-blocking and event-driven architecture, making it efficient for building scalable and real-time applications. Its javascript base allows for unified server-client code, streamlining development.
This blog will explore how to integrate payment gateway APIs using Stripe Node.js. To leverage these technologies effortlessly and securely, follow these steps to gain the necessary knowledge and skills.
What is a Stripe payment gateway?
Stripe is a popular online payment gateway that enables businesses to take payments securely and efficiently over the Internet. Furthermore, it provides the developer with a feature-rich platform, allowing seamless Stripe Node.js server integration into websites and mobile apps for stripe payment processing Node.js credit card and other payment transactions.
How does Stripe.js work?
You can interact with Stripe APIs using Stripe.js, a Javascript library. The Stripe server verifies and stores the card details if correct after the user fills in the checkout details on the form. Furthermore, your server receives a temporary token and personal information. Using Stripe API with Node.js, you won’t have to handle any card information on your server.

Types of payment method APIs
There are three types of payment APIs. And those are,
- Node.js Stripe checkout integration
- Charges API
- Node.js Stripe payment intents API
- Node.js Stripe subscription integration
- Stripe Node.js server integration,
- Node.js Stripe billing integration
- Node.js Stripe webhook integration
Prerequisites
- Install Node
- Get Node.js Stripe API best practices
- Postman for API calling
- Install stripe dependencies
Getting started with stripe payment APIs
1. Stripe Checkout
Here we’re going to see, An overview of Stripe payment form Node.js checkout, and how to build a simple checkout integration to accept one-time payments.
- A payment page has already been built using Stripe Checkout.
- Stripe checkout includes two steps for accepting payment.
- Create a checkout process for the product your customer wants to buy.
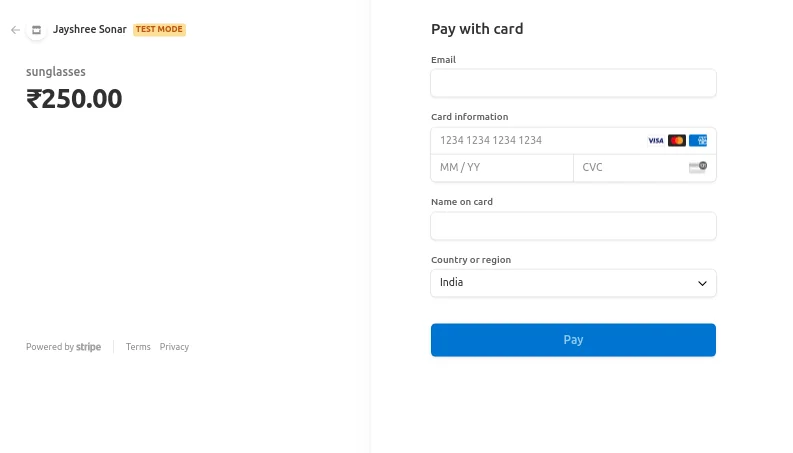
- Now, Redirect your customer to complete a stripe-hosted payment form to process their transaction successfully.
- Consider implementing a webhook handler to automate purchase fulfillment. It includes sending an email to the customer after their transactions.
- Checkout session creation on the server is illustrated in this stripe api example. Here we are using the stripe-node client library.
- We configure the library using our stripe secret key and then call an API to create the checkout session object.
Once the response is returned from the API that session variable will contain the data including an id that’s used to redirect from the front end.
app.js
- Define your route for API in the app.js file.
-
var indexRouter = require('./routes/index'); app.use('/', indexRouter); -
routes / index.js
- Create a checkout process for the product your customer wants to buy
-
var express = require('express');
                    var router = express.Router();
                    const stripe = require("stripe")('sk_test_51JINs1SHKFpjeywqugn3nyuLK1inUNc6uN5GJsN0ESwCahDK8uOSLhXgS0ezrTqPRp5TxaW2jynxhFWno7fPfOeV00Y5a48XSG');

                    /* GET home page. */
                    router.get('/', function(req, res, next) {
                    res.render('index', { title: 'Stripe Checkout Example' });
                    });

                    router.post('/create-checkout-session', async function(req, res, next) {
                    try {
                    const session = await stripe.checkout.sessions.create({
                    customer: 'cus_KudUxj75qTue5P',
                    payment_method_types: ["card"],
                    mode: "payment",
                    line_items: [{
                    price: 'price_1KEoG2SHKFpjeywqDvm3EbiI', // One time pricing
                    quantity: req.body.quantity
                    }],
                    success_url: 'http://localhost:4900/success.html?id={CHECKOUT_SESSION_ID}',
                    cancel_url: 'http://localhost:4900/cancel.html',
                    })
                    res.send({ id: session.id });
                    } catch (e) {
                    throw new Error(e);
                    }
                    });

                    module.exports = router;
-
views / index.ejs
- Redirect your customer to complete a stripe-hosted payment form to process their transaction successfully.
-
var express = require('express');
                    var router = express.Router();
                    const stripe = require("stripe")('sk_test_51JINs1SHKFpjeywqugn3nyuLK1inUNc6uN5GJsN0ESwCahDK8uOSLhXgS0ezrTqPRp5TxaW2jynxhFWno7fPfOeV00Y5a48XSG');

                    /* GET home page. */
                    router.get('/', function(req, res, next) {
                    res.render('index', { title: 'Stripe Checkout Example' });
                    });

                    router.post('/create-checkout-session', async function(req, res, next) {
                    try {
                    const session = await stripe.checkout.sessions.create({
                    customer: 'cus_KudUxj75qTue5P',
                    payment_method_types: ["card"],
                    mode: "payment",
                    line_items: [{
                    price: 'price_1KEoG2SHKFpjeywqDvm3EbiI', // One time pricing
                    quantity: req.body.quantity
                    }],
                    success_url: 'http://localhost:4900/success.html?id={CHECKOUT_SESSION_ID}',
                    cancel_url: 'http://localhost:4900/cancel.html',
                    })
                    res.send({ id: session.id });
                    } catch (e) {
                    throw new Error(e);
                    }
                    });

                    module.exports = router;
-
success.html
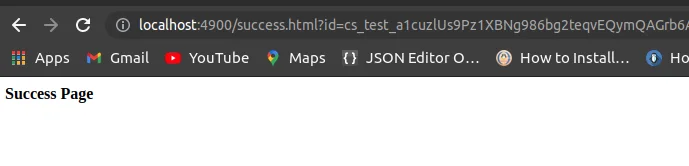
- If the payment is successful, the customer will be redirected to the success page.
-
<!DOCTYPE html>
                    <html lang="en">
                    <head>
                    <meta charset="UTF-8">
                    <meta name="viewport" content="width=device-width, initial-scale=1.0">
                    </head>
                    <body>
                    <b>Success Page</b>
                    </body>
                    </html>
-
cancel.html
-
<!DOCTYPE html>
                    <html lang="en">
                    <head>
                    <meta charset="UTF-8">
                    <meta name="viewport" content="width=device-width, initial-scale=1.0">
                    </head>
                    <body>
                    <b>cancel Page</b>
                    </body>
                    </html>
-
-
Output
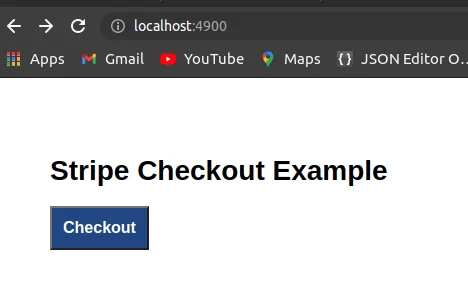
- After clicking on the Checkout button.
-
success page:

2. Charges API
- Using Charges and payment Intent APIs you can create your payment flow.
- The Charges API is used to build basic payment flow without handling SCA or Strong customer authentication.
Steps to create stripe charges
- app.js
-
var indexRouter = require('./routes/index');
                    app.use('/', indexRouter);
-
routes / index.js
- Define routes for creating customers, add a new card and create charges for customers.
-
var express = require('express');
                    var router = express.Router();
                    const STRIPEHANDLER = require('../controllers/stripeHandler');

                    router.post('/create-Customer', STRIPEHANDLER.createNewCustomer);
                    router.post('/add-Card', STRIPEHANDLER.addNewCard);
                    router.post('/create-Charges', STRIPEHANDLER.createCharges);

                    module.exports = router;
-
-
Create customer
-
const Stripe_Key = "sk_test_51JINs1SHKFpjeywqugn3nyuLK1inUNc6uN5GJsN0ESwCahDK8uOSLhXgS0ezrTqPRp5TxaW2jynxhFWno7fPfOeV00Y5a48XSG"; const stripe = require("stripe")(Stripe_Key); module.exports.createNewCustomer = async(req, res, next) =>{ try{ const customer = await stripe.customers.create({ name: req.body.name, email: req.body.email, }); res.status(200).send(customer); }catch(error){ throw new Error(error); } } 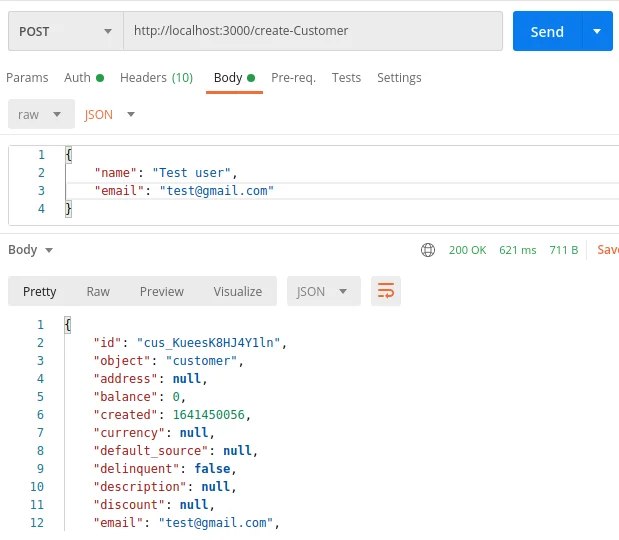
-
Create or add a new card
-
module.exports.addNewCard = async(req, res, next) =>{ const { customer_Id, card_Name, card_ExpYear, card_ExpMonth, card_Number, card_CVC, } = req.body; try { const card_Token = await stripe.tokens.create({ card: { name: card_Name, number: card_Number, exp_month: card_ExpMonth, exp_year: card_ExpYear, cvc: card_CVC, }, }); const card = await stripe.customers.createSource(customer_Id, { source: `${card_Token.id}`, }); return res.status(200).send({ card: card.id }); } catch (error) { throw new Error(error); } } 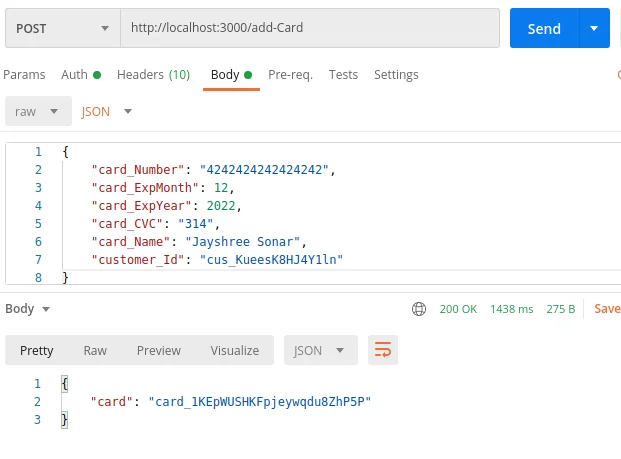
-
Create charges
- Using customer and card ID creates new charges.
-
module.exports.createCharges = async(req, res, next) =>{ try{ const createCharge = await stripe.charges.create({ receipt_email: '[email protected]', amount: 50*100, //USD*100 currency: "inr", card: req.body.card_ID, customer: req.body.customer_Id, }); res.send(createCharge); }catch(err){ throw new Error(error); } } 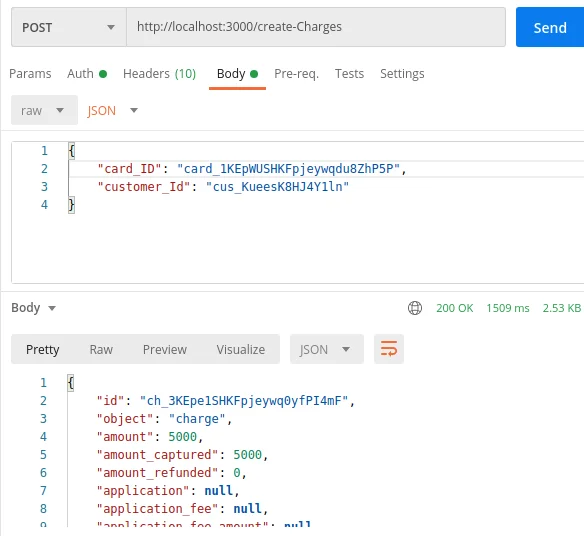
-
Output

3. Payment Intents API
- The Charges API has been replaced with the Payment Intent API.
- Payment intent API provides Strong customer authentication or SCA.
- The Stripe payment gateway Node.js order API has replaced tokens, which were previously used to securely transmit customer card information.
- In this example, we will learn how to accept a one-time payment using payment intent and Integrate Stripe payments server-side Node.js.
index.js
var express = require('express');
                    var router = express.Router();
                    const stripe = require('stripe')('sk_test_51JINs1SHKFpjeywqugn3nyuLK1inUNc6uN5GJsN0ESwCahDK8uOSLhXgS0ezrTqPRp5TxaW2jynxhFWno7fPfOeV00Y5a48XSG');

                    router.post('/', async function(req, res, next) {
                    let paymentMethod = await stripe.paymentMethods.create({
                    type: 'card',
                    card: {
                    number: '4242424242424242',
                    exp_month: 9,
                    exp_year: 2022,
                    cvc: '314',
                    },
                    });
                    paymentIntent = await stripe.paymentIntents.create({
                    payment_method: paymentMethod.id,
                    amount: 75*100, // USD*100
                    currency: 'inr',
                    confirm: true,
                    payment_method_types: ['card'],
                    });

                    res.send(paymentIntent);
                    });

                    module.exports = router;
Call API
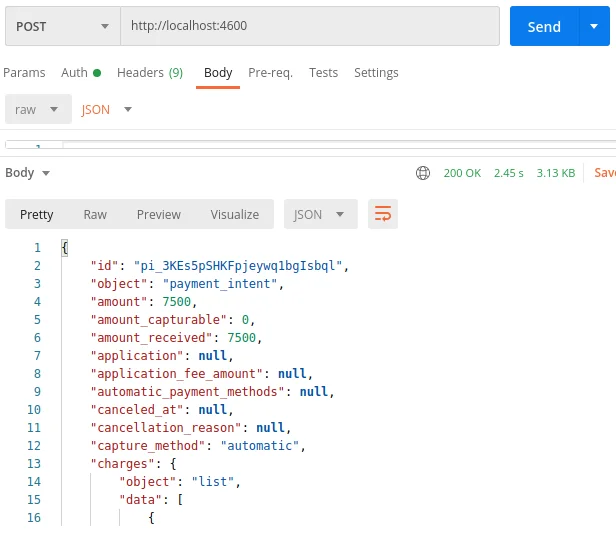
Output

This is the fully functional code for handling payments and related data. It’ll work properly if you simply replace the sandbox key with your Stripe API key.
Stripe, on the other hand, makes it incredibly simple to develop payment sites without ever having to deal with sensitive data like credit card information, as you’ve seen.
How Bigscal helps?
As a leading software development company, we provide our clients with the best possible Node Js services tailored to meet their needs. Bigscal provides dynamic solutions to their clients that are adjusted with their goals. We help clients to integrate client-side and server-side logic using Javascript, optimizing development speed and code maintainability. Hire node js developers from Bigscal to elevate your digital presence and ensure the success of your web applications.

Conclusion
Node js stripe integration with payment gateway opens up a wide range of possibilities for streamlined payment processing. So, use Stripe payments API in Node.js. Our applications can be fully functional when well-integrated with stripe-js.
FAQ
What is the function of Stripe Node API?
Developers can process payments and access other services by integrating the Stripe payment gateway into Node.js applications.
What is the language of Stripe API?
Clients and servers communicate using HTTP in Stripe API, which follows RESTful principles.
Can ones Stripe account be connected to multiple platforms?
Business owners can connect their Stripe accounts to multiple platforms and accept payments across websites, apps, and platforms.
How to implement Stripe Payment in nodejs?
To implement stripe payment in Node.js, use the npm stripe package and stripe API. Set up the required dependencies, create a token for the payment, and then process the payment using the token and stripe API.
What is the API for payment confirmation?
With Node.js Stripe secure payments Confirmation (SPC), you can automate the authentication process during a payment transaction. In addition to scaling authentication across merchants, using it within a wide range of authentication protocols, and establishing cryptographic evidence of confirmation of transaction details, it is designed to be used with a wide range of authentication protocols.
What is npm install stripe?
Npm install stripe’ is a command to install the stripe javascript library via npm. This stripe npm library facilitates integration with payment platforms, enabling developers to handle online application payments.


