Why is DocuSign the best for eSignature?
Quick Summary: DocuSign is the best eSignature solution because it is easy to use, secure and has good acceptance by clients. It is convenient because people do not have to physically sign documents, but they can sign them via electronic means from the comfort of their homes, offices, or from any location of their choosing. Features such as automated compliance with both legal requirements and numerous workflows make it as efficient and reliable for use by both the part and individuals.
Introduction
DocuSign eSignature is the world’s #1 way to send and sign from practically anywhere, at any time. Electronic signatures have been used for electronically signing offer letters, sales contracts, permission slips, rental/lease agreements, liability waivers, financial documents, etc.
It is always free to use DocuSign eSignature to sign documents. Users can sign and annotate documents using DocuSign Ink by attaching a saved signature, which can be made in graphic design software, grabbed from an image of a paper document, or chosen from a library of prefabricated signatures depending on the user’s legal name.
How its work?
The saved signature can be used on PDFs, Word documents, and images. To finish a document, participants sign it and upload it to a cloud storage service for review. If a signed document is checked later, the hash will not match the information stored by DocuSign if it has been tampered with or After adding e-signature to your PDFs, you can also password protect them from the online converter that contains the best and easy to process password protect pdf tool. Similarly, for precise document management, an online PDF splitter tool can help extract exactly what you need from large files.
while understanding electronic signature software pricing helps businesses choose the right solution for their workflow.
- DocuSign accelerates and secures any workflow or approval process, allowing you to focus on your business and life.

Sign a Document with DocuSign:
DocuSign signing terminology
- Email notification –
The means by which signers are informed that they have an electronic document to sign. The email notification contains a link that directs the signer to the document. - Envelope –
The container that maintains one or more documents. The envelope also holds the recipient information and the fields placed on the documents. Before sending a document for signature, plain written content can be prepared through text to PDF converter platforms - Sender –
Users who can create, send and manage DocuSign envelopes - Signer –
An envelope recipient is required to act on an envelope or the documents stored within an envelope. - Fields –
Indicate where a Signer must take action on the document. For example, filling in data, making a selection, or applying a signature.
Signer Authentication
- Phone –
You answer a phone call and receive a verbal authentication code, and then enter the code to view your documents. - SMS –
You receive an SMS text message at a specified phone number. The text message contains an access code that you must enter to view your documents. - Knowledge-based ID check –
You must answer detailed questions about yourself. The questions are based on data available in public records (such as current and former addresses)
Welcome and Electronic Record and Signature Consent
The welcome page includes a message from the sender and an Electronic Record and Signature Disclosure requesting your consent to sign electronically.
The welcome and instructions, along with any messages from the sender, appear at the top of the browser.
To proceed with the signing process, tick the check box I agree to use electronic records and signatures, then click CONTINUE.
![]()
Examine the disclosure and check the box indicating your agreement to use electronic records and signatures, then click CONTINUE.

You can also use the OTHER ACTIONS menu on the right side of the browser to choose a different option for the documents, such as Finish later, Print & Sign, or Decline to Sign.
After you have added the required information and signed the documents, the actions move to the bottom of the browser and the FINISH button becomes active. Select FINISH to complete the signing.
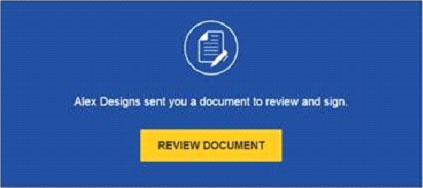
Step 1: Review the DocuSign email:
Open the email and review the sender’s message.
To begin the signing process, click REVIEW DOCUMENT.
Step 2: Agree to sign electronically:
Examine the consumer disclosure and check the box I consent to the use of electronic records and signatures. To begin the signing process, click CONTINUE.
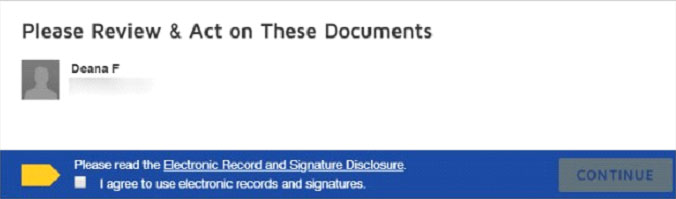
Important! You must agree to conduct business electronically in order to view and sign the documents. Note: To see more options, click OTHER ACTIONS. For more information on other actions available, please review our Signing Documentation.
Step 3: Start the signing process:
To begin the signing process, click the START tag on the left.

Click the SIGN option.
You will be asked to Adopt Your Signature.
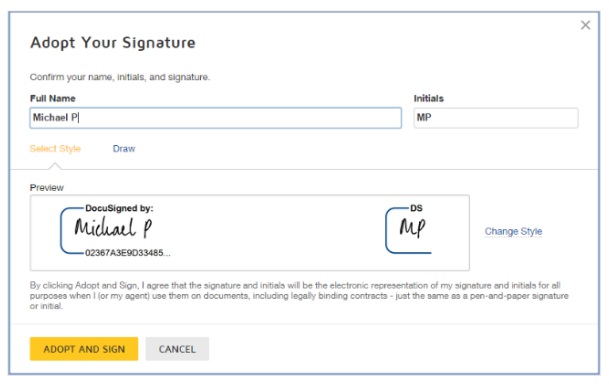
Step 4: Confirm your name:
Make sure your name and initials are correct. If not, change them as needed.
Step 5:
Adopt a signature
Step 6:
Click on ADOPT AND SIGN to adopt and Save your signature information and return to the document.
Step 7:
Confirm signing:
When you’ve finished clicking all of the electronic signature tags in the document, click FINISH to confirm signing. You will see a message indicating that you have completed your document. You can now download or print a PDF copy of the document.
Step 8: Sign up for a DocuSign account:
Sign up for a DocuSign account and save the document in your own account.
Advantages of DocuSign:
- International
- Security
- Reporting
- Sending and Signing Experience
- Signer Authentication
- Document Creation
- reduce the amount of actual paperwork and clutter.
Conclusion
Therefore, it can be suggested that DocuSign is the best eSignature tool due to its functionality, enhanced security measures, and compatibility with other business applications. Due to its reliability and legal compliance, the system provides safe and fast signing of documents. For any business, be it a startup or an enterprise, DocuSign is very scalable and versatile for all your eSignature requirements. Because of this, you stand to benefit from time-saving, minimize paperwork. And it needs less time to complete numerous processes as you incorporate DocuSign to your business processes.
FAQ
What Makes DocuSign Stand Out Among Other eSignature Solutions?
The key reasons why it is important to go for DocuSign include; The user interface is friendly The platform has great security features It is integrated with numerous applications. It has a smooth flow of all sender and signers and greatly facilitates a fast signing procedure. Furthermore, it is critically important that DocuSign adheres to all the eSignature laws and standards in all the countries that this platform operates in.
How Does DocuSign Ensure the Security of My Documents?
In security, DocuSign employs high-security measures to protect the documents and user data through the encryption methods. Both the document sent for signing and the document stored on the platform are secure from hackers and third parties, with a facility that allows users to authenticate themselves through several layers of security questions and IDs. DocuSign also retains complete records of all the papers, displaying information on every action in a bid to make processes more secure and transparent.
Can DocuSign Integrate with Other Business Tools I Use?
Yes, DocuSign has robust integration features through various applications and platforms, such as Salesforce, Office 365, Suite Google, and others. These integrations help to deliver documents, collect and sign them, and manage them within the tools that users already interact with, increasing the speed of work within different contexts.
Is DocuSign Legally Binding and Compliant with International Standards?
Absolutely. DocuSign adhere to the Electronic Signatures in Global and National Commerce Act (ESIGN Act) in the United States, eIDAS regulation in the European Union and other eSignature laws all over the world.
How Easy Is It to Use DocuSign for First-Time Users?
The tools within the DocuSign system should be as self-explanatory as possible to ensure that even a first-time user would understand them.
{
“@context”: “https://schema.org”,
“@type”: “FAQPage”,
“mainEntity”: [{
“@type”: “Question”,
“name”: “What Makes DocuSign Stand Out Among Other eSignature Solutions?”,
“acceptedAnswer”: {
“@type”: “Answer”,
“text”: “The key reasons why it is important to go for DocuSign include; The user interface is friendly The platform has great security features It is integrated with numerous applications. It has a smooth flow of all sender and signers and greatly facilitates a fast signing procedure. Furthermore, it is critically important that DocuSign adheres to all the eSignature laws and standards in all the countries that this platform operates in.”
}
},{
“@type”: “Question”,
“name”: “How Does DocuSign Ensure the Security of My Documents?”,
“acceptedAnswer”: {
“@type”: “Answer”,
“text”: “In security, DocuSign employs high-security measures to protect the documents and user data through the encryption methods. Both the document sent for signing and the document stored on the platform are secure from hackers and third parties, with a facility that allows users to authenticate themselves through several layers of security questions and IDs. DocuSign also retains complete records of all the papers, displaying information on every action in a bid to make processes more secure and transparent.”
}
},{
“@type”: “Question”,
“name”: “Can DocuSign Integrate with Other Business Tools I Use?”,
“acceptedAnswer”: {
“@type”: “Answer”,
“text”: “Yes, DocuSign has robust integration features through various applications and platforms, such as Salesforce, Office 365, Suite Google, and others. These integrations help to deliver documents, collect and sign them, and manage them within the tools that users already interact with, increasing the speed of work within different contexts.”
}
},{
“@type”: “Question”,
“name”: “Is DocuSign Legally Binding and Compliant with International Standards?”,
“acceptedAnswer”: {
“@type”: “Answer”,
“text”: “Absolutely. DocuSign adhere to the Electronic Signatures in Global and National Commerce Act (ESIGN Act) in the United States, eIDAS regulation in the European Union and other eSignature laws all over the world. This has a legal implication, making DocuSign legal to be used across the world and users can be assured of the agreements signed with such a platform.”
}
},{
“@type”: “Question”,
“name”: “How Easy Is It to Use DocuSign for First-Time Users?”,
“acceptedAnswer”: {
“@type”: “Answer”,
“text”: “The tools within the DocuSign system should be as self-explanatory as possible to ensure that even a first-time user would understand them. It also has direct and signed mailing features that are subdivided into detailed procedures accompanied by easy-to-follow interfaces.”
}
}]
}

