
How to Integrate Google Maps With React JS
Quick Summary: This article provides a comprehensive and easy-to-follow guide on integrating Google Maps with React JS, enabling developers to enhance their web applications with powerful mapping functionalities. The step-by-step tutorial covers critical aspects such as obtaining the necessary API key, setting up a React project, installing and configuring the necessary packages, and implementing interactive map components. Following this tutorial, developers can seamlessly incorporate Google Maps into their React JS projects, enabling location-based features and providing a more engaging user experience.
Introduction
We’ll cover one of the most prevalent reasons you wish to include Google Maps with React JS: indicating the address of your business and showing your company address. If you like, you may use this as a place to start for more complex situations.
We’ll need the Google map-react package to assist us in incorporating Google Maps into our React project because it’s tremendously strong and sophisticated. This package contains a component that renders any React component on a Google Map using a tiny set of the Google Maps API. I use it first whenever I want to make a React app that uses Google Maps. It is well-maintained and easy to use.
It is only a sample of what the Google Maps API can do, and you may have additional business requirements. Because this is the most typical use case We’ve found, we’ll develop a contact page with a map indicating the business’s address for this guide. If you need something more complicated, the google-map-React team has offered a set of samples you may go over.
So, read first and decide whether you need professional React.js services.
There are a variety of reasons why you would want to use Google Maps in your React app, and we’ll look at one of the most common ones: showing your company address. If you like, you may use this as a starting point for more complicated scenarios.
Why One Need To Integrate Google Maps
Here are a few reasons why you might consider using Google Maps on your website, and you may approach Outsource ReactJS Services for integrating Google Maps with React.
- Offer directions to your company’s location.
- To depict a path to an event (i.e., a concert or conference).
- To offer real-time updates on the whereabouts of a mailed item.
- Showcase fascinating locations from across the world.
Requirements for integrating Google Maps into your React application
Setup of a React application
A Google Maps API key (which is entirely free)
You may obtain a free Google Maps API key by following the procedures in the Google Maps documentation. You’ll need to create a billing account to eliminate the limits and watermarks that come with it..
Google Maps integration in React
To be clear, we will not go into all of the contact page code because this blog focuses on integrating Google Maps into a React project. The stages we’ll take are as follows:
- To hold the map, create a React component (Map.jsx)
- To mark the address on the map, create a new React component (LocationPin.jsx)
Map.jsx
mkdir src/components/map && touch src/components/Map.jsx
Use the command above to create a new file in the /components folder. In the following section, We’ll create the map’s code element and the address pin. However, we must first install the google-map-react package using the command: before we can start writing code.
yarn add google-map-react
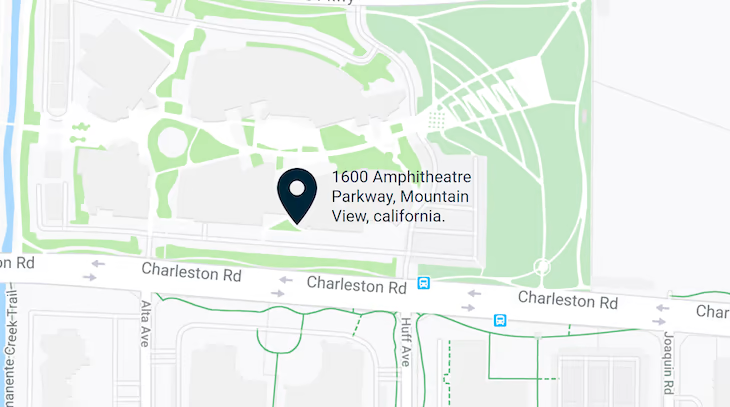
After installing the software, we will also want our corporate address coordinates. It entails a fast Google search for your company’s longitude and latitude information. I quickly searched using Google’s Amphitheater address and came up with the following results:
const location = {
            address: '1600 Amphitheatre Parkway, Mountain View, california.',
            lat: 37.42216,
            lng: -122.08427,
            }
Of course, the figures for your address will be different. As demonstrated above, we save the data in the object and provide them to the Map component so that we can draw a pin on the map. To summarise, you’ll require the following information:
API Key for Google Maps
Installed google-map-react
Values for longitude and latitude for your company address
We can begin putting up the Map component now that we have all this information. If you want to view the completed code, go to the add-map branch of the repo you cloned earlier, but if you want to learn how to construct it yourself, stick with the tutorial.
Import React, the google-map-package, and the related CSS into src/components/map/Map.jsx as follows:
import React from 'react'
            import GoogleMapReact from 'google-map-react'
            import './map.css'
To implement a Map component that accepts two props, follow these steps:
Create a new Map component that takes in two props:
const Map = ({ location, zoomLevel }) => (
            <div className="map">
            <h2 className="map-h2">Come Visit Us At Our Campus</h2>

            <div className="google-map">
            <GoogleMapReact
            bootstrapURLKeys={{ key: '' }}
            defaultCenter={location}
            defaultZoom={zoomLevel}
            >
            <LocationPin
            lat={location.lat}
            lng={location.lng}
            text={location.address}
            />
            </GoogleMapReact>
            </div>
            </div>
            )
Are you able to figure out what the location prop is? It’s the object we made before that stores the location’s address, latitude, and longitude information. The scale of the map when presented on the screen is determined by zoom level, which is an integer ranging from 0 to 20.
You’ll see that the GoogleMapReact component has a child called LocationPin, but it may have many children. The text prop will be rendered on top of the map at the place specified by the lat and long values. In the next step, we’ll make this component.
Check out what GoogleMapReact does with the props it receives:
bootstrapURLKeys is a container for the API key you copied from the Google Console. You can now hardcode the key in this location, but this is not advised for code that will be submitted to GitHub or otherwise made public.
When the map loads for the first time,defaultCenter is merely the middle of the map.
Default zoom determines the map’s initial scale.
This is enough to display a basic map on the screen, but we need to do something extra before we can display this component. The code for LocationPin must be written.
LocationPin
LocationPin
We’d like to be able to draw users’ attention to a particular spot on the map. We can develop an essential component that shows a pin icon and text using Google-map-react, which allows us to render any React component on the map.
I’ll be utilizing a free library of SVG icons called Iconify for the icon. Continue working in the same file and import the following packages as follows:
import { Icon } from '@iconify/react'
            import locationIcon from '@iconify/icons-mdi/map-marker'
Then, as follows, define the LocationPin component:
const LocationPin = ({ text }) => (
            <div className="pin">
            <Icon icon={locationIcon} className="pin-icon" />
            <p className="pin-text">{text}</p>
            </div>
            )
            export default Map
This component, I’m sure, is self-explanatory. LocationPin’s styling is already included in map.css, but you may style it as you like.
All that is left is to export the Map component and add it to the contact page. Please ensure that you export the Map component at the bottom of the file.
Using the Map component
We may use the Map component wherever we want because it is just a React component. Import the Map component into src/App.jsx and place it between ContactSection and DisclaimerSection, as follows:
import React from 'react'

            import IntroSection from './components/intro/Intro'
            import ContactSection from './components/contact-section/ContactSection'
            import MapSection from './components/map/Map' // import the map here
            import DisclaimerSection from './components/disclaimer/Disclaimer'
            import FooterSection from './components/footer/Footer'

            import './app.css'

            const location = {
            address: '1600 Amphitheatre Parkway, Mountain View, california.',
            lat: 37.42216,
            lng: -122.08427,
            } // our location object from earlier

            const App = () => (
            <div className="App">
            <IntroSection />
            <ContactSection />
            <MapSection location={location} zoomLevel={17} /> {/* include it here */}
            <DisclaimerSection />
            <FooterSection />
            </div>
            )
            export default App
Now run yarn start in your terminal and browse to localhost:3000 to begin the project. You should see a nice-looking map on your contact page that pinpoints your business address. Isn’t that clever?
Conclusion
To sum it up, combining React JS with Google Maps is the way forward for developers as it allows them to use the powerful location-based features in their web applications. After the step-by-step guide, developers can easily get a Google Maps API key, set up a React project, and integrate the interactive maps in their applications the easiest way. Thus, the integration of the app Google Maps becomes a more pleasing experience for the user and at the same time allows the developers to use the whole services of Google Maps, e.g. geocoding and distance calculations.
Google Maps React is the combination of both of them that allows developers to build applications that are dynamic and responsive that can be used for different purposes, from simple location to complex mapping. Nevertheless, it is significant to be conscious of the possible costs that come with using the Google Maps API after the free tier and developers should check the pricing details to make sure it matches their project’s needs.
FAQ
What is React JS?
React JS is one of the popular JavaScript libraries that are used for building the user interfaces, mostly for web applications. It is the platform where developers can design and build reusable and interactive user interface components that can be used for the sake of the application’s management.
Why should I integrate Google Maps with React JS?
The joining of Google Maps with React JS allows you to add impressive mapping features to your web application, such as a display of locations, geocoding of addresses, a calculation of distances, and an interactive map for a better user experience.
How do I obtain a Google Maps API key?
To obtain a Google Maps API key, you are required to create a project in the Google Cloud Console, activate the Maps JavaScript API, and then generate an API key that is associated with your project. The API generated by this will be useful in understanding how these blended can be used in the project and whether they will work sufficiently.
What packages are commonly in use to integrate Google Maps with React JS?
Some popular packages for integrating Google Maps with React JS are “react-google-maps” and “@react-google-maps/api”. They provide React components that simplify the integration process. When the components are available seamlessly the integration will become much easier as well.
Is there a cost associated with using Google Maps API?
Sure, Google Maps API usage could have expenses that surpass a certain limit of usage. Google has different pricing plans, one of which is the one that is free but has limited usage. The cost details and the way of billing have to be checked and the billing has to be set up to make sure that the API use fits the project’s needs.

